Cool image effect using Compound Path in InDesign
First step is to create frames
Select rectangle (M), Ellipse (L) or Polygon tool and draw shapes freely on page. In this example I draw 4 elliptival shapes. Press V or Esc to switch to Selection tool and drag marquee over all shapes you previosly created.
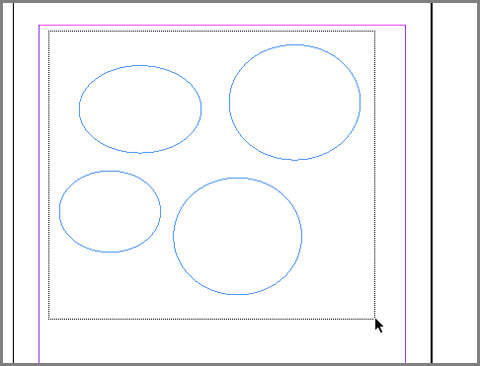
Drag marquee to select all shapes
With all shapes selected go to Object > Paths > Make Compound Path or just press Ctrl + 8. Now you have compound path and bounding box around it, if you don’t, click once on any shape with Selection tool to appear.
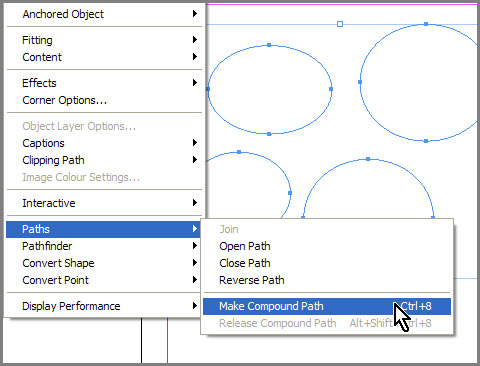
Make Compound Path from selected shapes
Place image into Compound Path
Go to File > Place (Ctrl + D) and navigate to the image, click on it to select it then click Open button. In Place dialog ensure Replace Selected Item option is turned on, you can turn of Show Import Option for now if you are not familiar or you do not know what this option can do because I am not covering it in this tutorial.
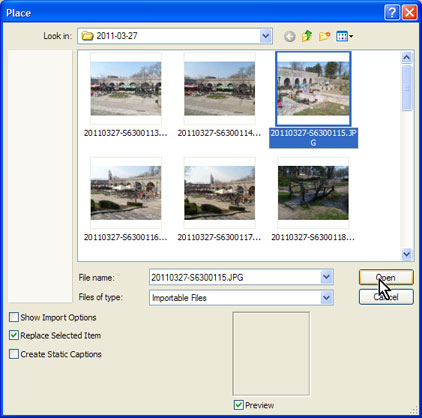
Place dialog
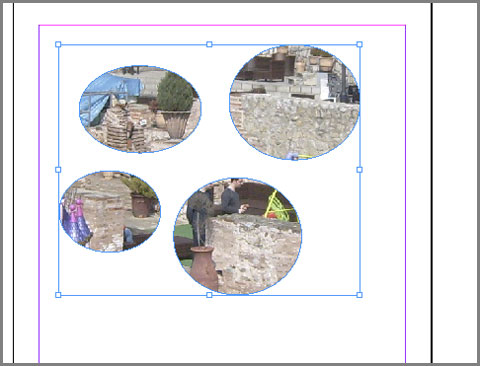
InDesign will fill all shapes with the same image creating this cool effect.
Compound path shapes filled with image
Move any of shapes
At this point you can scale or resize frames or image inside frames. That’s not all, you can even reposition shapes! Yes you can. Press A on your keyboard to activate Direct Selection tool and click on pasteboard to deselect everything. Navigate to any of shape border (tiny line that defines shape) and click once. When you select shape, anchor points with handles will appear so you can modify shape if you want to.
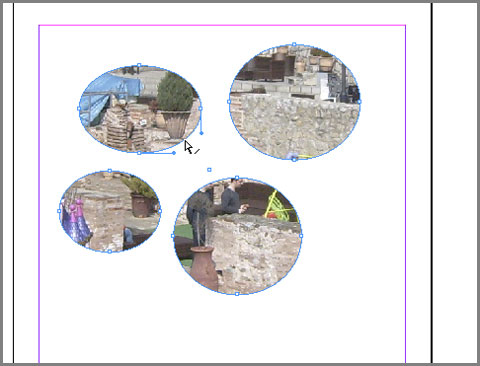
Click tiny line that defines shape (path) to select it
Press Alt on your keyboard and plus sign will appear below white arrow key, click one more time shape border (path) to select all anchor points of that shape.

Alt + click one more time path (shape border) to select all anchor points
Now that you have all anchor points of that particular shape selected, click again on shape border, hold down left mouse button and drag to move shape on different location.
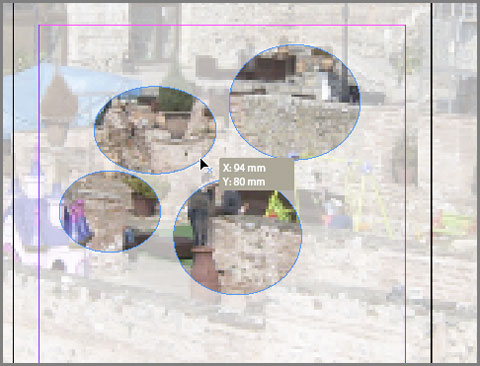
With all anchor points selected, click and holding down left mouse button drag to
reposition shape to different location
Add shape to Compound Path
Is that all? Well, you can do and something more.. If you want. Select any of shape tools and draw another shape, then press V or Esc to activate Selection tool and drag marquee over all shapes to select all of them, then go again to Object > Paths > Make Compound Path (Ctrl + 8) to add and new shape to compound path which will be automatically filled with image.
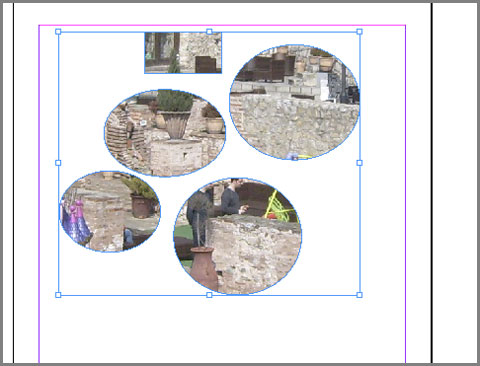
New shape added to compound path
Remove (delete) shape from Compound Path
Great, now you have question: Can I remove or delete any shape from Compound Path? Answer is: yes. First click on shape border or path with Direct Selection tool, then Alt click again on shape path to select all anchor points and press Delete key on your keyboard.
Great, now you have question: Can I remove or delete any shape from Compound Path? Answer is: yes. First click on shape border or path with Direct Selection tool, then Alt click again on shape path to select all anchor points and press Delete key on your keyboard.
source: http://adobephotoshopsecrets.blogspot.com/2012/05/creating-cool-image-effects-using.html
No comments:
Post a Comment