Drag to Copy Swatches

Need to copy a bunch of color swatches from one open InDesign document to another? There's no faster way than drag and drop!

Just arrange the two documents on your screen so you can see them both (a quick way to do this is to choose the 2-up option from the Arrange Documents pop-up in the Application Bar).


Then click in the document containing the swatches you want to copy. Select the swatches by Shift-clicking to select a range, or Command/Ctrl-clicking to select ones that aren’t next to each other.


Then drag and drop the swatches from the panel into the receiving document. Just don’t start dragging from one of the little colored squares or only that one swatch will be copied over. Drag from anywhere else on the selected swatches to copy them all.


Select Pages Before Moving Them

You can move or copy pages from one document to another by choosing Layout > Pages > Move Pages.

And you can make the process even easier by first selecting the pages you want to move in the Pages panel.


Then, when you open Move Pages dialog box, those pages will be already entered for you.


InDesign Tips: Better-Looking Drop Shadows

Even in this age of Flat Design, you occasionally need to add a drop shadow or two to make items pop. When you do, add a little noise—just 3–5% is plenty in most cases—to create a more natural-looking effect.

Creating Spot Color Swatches

To quickly create a spot color swatch, just hold down the Control (Windows) or Command (Mac OS) key on the keyboard while clicking the New Swatch button at the bottom of the Swatches panel.


If you want to edit the name or color values of the new swatch, press Alt+Control (Windows) or Option+Command (Mac OS) when you click the New Swatch button to open the Swatch Options dialog box.


Instant Violators in InDesign

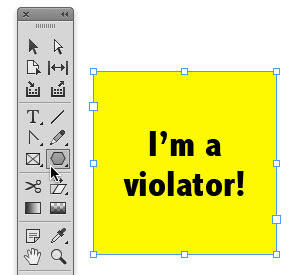
Did you know that starbursts, banners, color bars, and similar attention-getting design elements are also called “violators”? This is because they violate the underlying design to attract your eye.

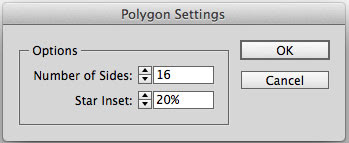
And in InDesign, you can convert a selected object into a starburst simply by double-clicking the Polygon tool and choosing the desired number of sides and star inset.


InDesign Tips- Reveal Tracking and Kerning

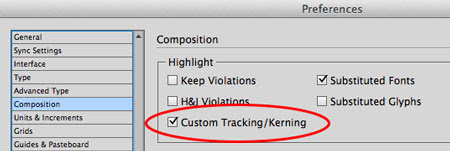
Ever receive a document and the text looks suspiciously squished in certain places? Suspect some rogue tracking has taken place? You can instantly reveal all tracking and kerning by going to Composition Preferences and choosing Highlight Custom Tracking/Kerning.


Manually applied tracking and kerning appears in dark green.


Tracking applied as part of a paragraph or character style appears in light green.

Adding Styles via Find/Change in InDesign

Did you know that you can add a style to an InDesign document via Find/Change?

Here’s how. Start in a document that contains the style.


Open Find/Change and specify the style in the Change Format section of the dialog box. (You also have to specify something in the Find what and/or Find Format sections.)


Switch to the document that doesn’t have the style, and run the Find/Change.


When you click either Change or Change All, the style is added to the document.


This way, you don’t have perform the extra step of creating or loading the style into the second document before running the Find/Change. InDesign assumes that if you’re asking to apply the style, you must want to add it.